In this guide, we will change the motherboard’s brand logo on the first boot screen to the image of a custom iMac Pro. Gigabyte users can easily change using the apps provided by Gigabyte. If you use a different brand of board, you can change the logo through a custom BIOS created using UEFI Tool.
prologue
Look at my old Boot screen image. Since this logo’s resolution is so small, it looks stretched and ugly in my 4k and 5k resolution monitors. But I found this guide and applied it to new boot screen image.

If you have a Gigabyte board, you are lucky to have easy fix method in Windows OS. However, you are ok with another coding method which is fixable in Mac OS as well.
Boot Splash Screen Cosmetics
Based on the ideas and instructions of @Matthew82 from InsanelyMac and @KGP from Tonymacx86, I modified an iMacPro.RAW file that achieved by @KGP.
For Gigabyte User (Windows only)
The individual steps for the BIOS Patching are detailed below:
This guide should be working on Window OS only!
1.) Go to official Gigabyte website and download the latest App Center and @Bios app.
2.) Install App Center first and install the @Bios app.
3.) Open the @Bios app and Click ‘Face Wizard’
4.) Browse your desired image to change and follow the instruction.

Warning! this method changes your Bios firmware version to the latest one.
For Other brands’ User (currently Mac only)
So far, I have known this method working in ASUS and Gigabyte brand.
If you have the experience with other else brand’s board, please let me know and I will update this post.
The individual steps for the BIOS Patching are detailed below:
1.) Installation of the BREW distribution:
a.) Open a terminal and change to “bash” shell.
bash
b.) Now enter the following “bash” terminal command and follow the standard BREW installation instructions:
/usr/bin/ruby -e "$(curl -fsSL https://raw.githubusercontent.com/Homebrew/install/master/install)"
2.) After the successful installation of the BREW distribution, we have to implement the QT5 distribution, again by using a “bash” terminal shell. Just enter the following “bash” terminal commands:
brew install qt5
brew link qt5 --force
3.) After successfully implementing BREW and QT5, we can now download the most actual CodeRush UEFIPatch distribution from Github to our home directory with the following terminal command:
git clone https://github.com/LongSoft/UEFITool
Now we have to change to ~/UEFITool/UEFIPatch/
cd ~/UEFITool/UEFIPatch/
and execute the following “bash” commands:
qmake uefipatch.pro
make
Now compile the UEFI Tool distribution with the following terminal commands:
cd ~/UEFITool/
qmake uefitool.pro
make
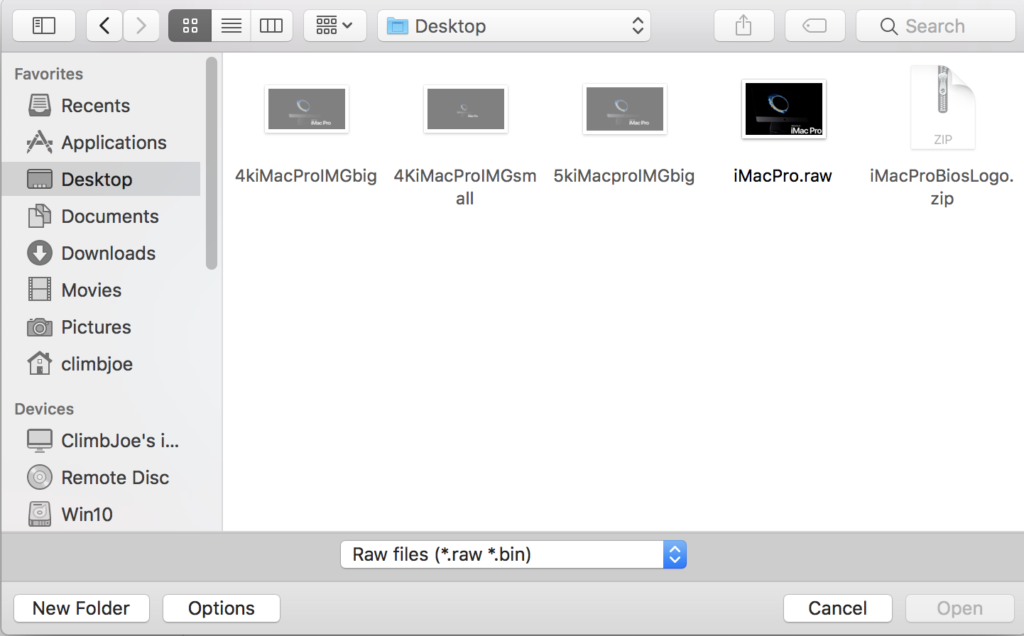
4.) Download and unzip the custom iMac Pro image to your Desktop.
Download file HereiMac Pro image
5.) Now launch by UEFITool by clicking on the newly compiled UEFITool.app in the UEFITool Folder in your home directory.

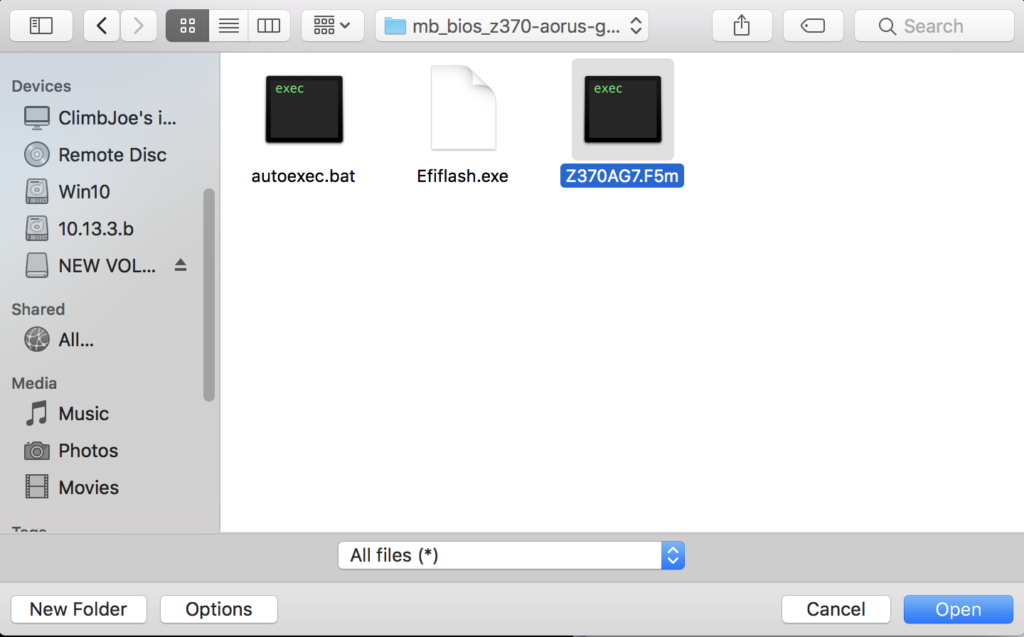
a.) Select “File” -> “Open image file” and load your patched or unpatched BIOS Firmware distribution.
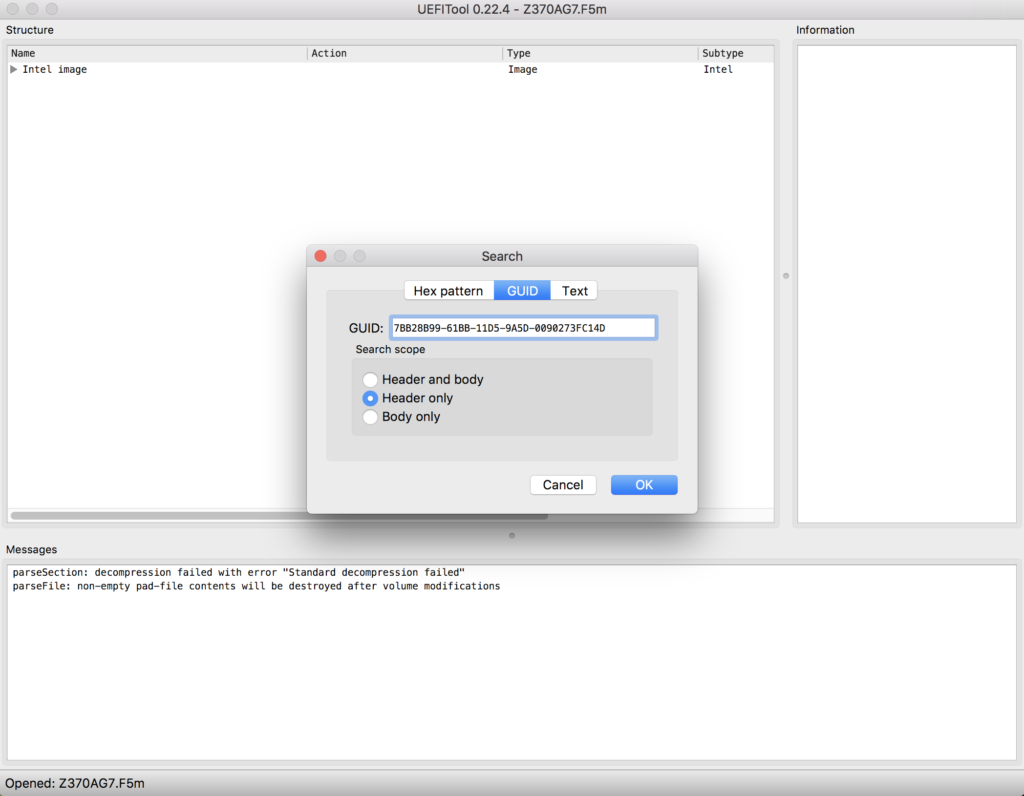
Select “Search..” in the UEFITool “Edit” Menu and perform a “GUID” search of “7BB28B99-61BB-11D5-9A5D-0090273FC14D” with “Header only”…
You will receive a message “GUID pattern “7BB28B99-61BB-11D5-9A5D-0090273FC14D” found as …. in 7BB28B99-….“. Double click on that message and search for the “Raw section” accompanying the “7BB28B99-….” entry, which indeed is the Boot Image.
To exchange the default original Boot Logo image file stored in “Raw Section” by the iMacPro.raw image file that you previously downloaded to your Desktop, right-click on “Raw section”, select this time “Replace body” and select the iMacPro.raw image file on your Desktop.

If the Boot Logo image dimension is too big for your Monitor’s screen resolution, you might just end up with a black screen during the BIOS initialization at boot.
How to make your custom logo image
You can make a custom logo for the raw file. See next method.
To do so, select in the Preview.app Menu -> “Tools” -> “Adjust Size”. Change the image dimension and save the modified image with “File” -> “Export”. In the “Export menu” press “Save”, after selecting “JPEG” under “Format”, after choosing “Desktop” as the place to store the image, and after entering the new file name, which has to end with “.jpg”.
Double-check by right-clicking on the resulting jpg image file and selecting “Get Info” that its file size does not exceed 200KB by far. If the latter would be the case, you would not be able to save the modified BIOS Firmware file subsequently.
Finally just rename your new “XXXX.jpg” file to “XXXX.raw…
I guess, that by following the procedure detailed above, it is obvious that iMacPro.raw also can be substituted by any other image of your personal choice. Just be aware that its background color should be black (ecstatic reason for its nice integration within the else black BIOS Boot Screen)
After replacing “Raw Section” with iMacPro.raw or the XXX.raw image of your choice, save your modified BIOS Firmware File with the Option “File” -> “Save Image File…”
a.) Copy your modified BIOS Firmware file to a USB3.0 Flash Drive, formatted with FAT32.
b.) Reboot, enter the Mainboard BIOS and save your BIOS settings to the USB Flash Drive
c.) Flash your mainboard BIOS with the modified BIOS Firmware
d.) Enter the Mainboard BIOS and restore your BIOS settings from the USB Flash Drive
e.) Save your restored BIOS settings, reboot and you are done.
Just don’t forget to set BIOS Setting “Boot Logo Display” to “Enable”, when using this new approach. Any different setting might result in a black screen during BIOS initialization. CSM disable makes mine suitable size.
Last modified: August 7, 2018


Hi there,
Q-Flash refuses to Flash with the custom BIOS Firmware File (Z370AG7.F6). It says “invalid file”.
Is this a known issue? Am I doing something wrong?
Thanks!
Awesome. Thanks for the original boot Aorus logo. I neglected to save mine when changing.
[…] How to change your mainboard boot logo image to custom iMac Pro image logo […]
Will this MAC method work on HACKINTOSHES? I mean, will it change things on BIOS level instead of EFI partition level?
Gigabyte disabled FACEwizard and the BIOS image cannot be changed. I tried using the UEFITOOL but I could not locate where the RAW image is from the description. The motherboard is Z390m Gaming, with F10 BIOS. https://download.gigabyte.com/FileList/BIOS/mb_bios_z390-m-gaming_8a1fag0j_f10.zip?v=f4d9b462df7d5bfdc1f42b1d7a1304e0. Can someone help?